2013年5月30日木曜日

Hokkaido Camp/Touring Planning: #1 How to Get There

In Japan, we say there are 2 types of motorcycle riders: those who have been in Hokkaido and those who haven’t.

That’s how much we, the Japanese riders, admire Hokkaido and we see it as a very holy place for us.

In this episode, I would like to talk about Hokkaido Camp-Touring.

Everyone thinks about it riding there someday and those who have done it always dreaming about going back again.

From where I live in Tokyo, Hokkaido is not an easy place to go.  I would need to get some time-off and it will not be a cheap trip... 

If you don’t mind renting a motorcycle while you are there, you can take a few hours flight and it won’t be hard to find a motorcycle you want to ride around.  But I am sure everyone would want to take your own.  There is no doubt it would be more memorable!

Currently, there is no road that connects Honshu and Hokkaido.  If you want to ride your motorcycle in Hokkaido but you don't live there, you will need to get on a ferry.  

There are several ferries available departing from ports in Honshu.  If you are in Tokyo/Kanto region, a ferry from Niigata to Otaru in Hokkaido and from Oarai in Ibaraki to Tomakomai in Hokkadio are the most popular routes.  You can also ride up to the north and take a ferry from Sendai in Miyagi to Tomakomai in Hokkaido, from Hachinohe in Aomori to Tomakomai, or from Aomori City to Hakodate.

Last year, I finally managed to get the holiest place for Japanese riders.  My choice was to take a ferry from Niigata to Otaru on the way and coming back from Tomakomai to Hachinohe.

Like other riders who have been in Hokkaido, I really enjoyed and want to go back again, hopefully this year too...


And like the last year, my budget and time off I can take will be limited again (well, mostly budget problem with my case), I am trying to find the most economical, yet, easiest and shortest way to get to Hokkaido so that I can spend more time and make my trip-money worth while I am there.

At this stage, I am planning (or hoping…) to take days off after Obon Week (Japanese summer vacation time) from August 17, 2013 (Sat) to August 25, 2013 (Sunday).  This helps lowering the ferry cost by avoiding the summer peak season when the fare normally is set higher than regular season.

Here are the comparison for several ferries from Tokyo to Hokkaido:

RouteNiigata ~
Otaru
Oarai ~
Tomakomai
Hachinohe ~
Tomakomai
Distance to the Port from Tokyo318 km126 km664 km
Riding Hours to the Port4h02m1h44m7h43m
Gas Consumption15.9 L6.3 L33.2 L
Gas Money
(160yen/litter)
¥2544¥1008¥5312
Expressway Toll¥2650¥1950¥5750
Cost to get to the port¥5194¥2958¥11062
Ferry CompanyShin Nihonkai
Ferry
MOL Ferry
(Sunflower)
Kawasaki Kinkai
Kisen
Fare¥16100¥31500¥14750
Departure10:30 AM (Aug 17)01:45 AM (Aug 17)08:45 AM (Aug 17)
Arrival04:30 AM (Aug 18)07:45 PM (Aug 17)04:00 PM (Aug 17)
TOTAL COST TO HOKKAIDO¥21294¥34458¥25812
* riding distance and hours are from Ikebukuro area in Tokyo (where I live) to each departing port
* gas consumption is based on my motorcycle (2006 XL883) overall average gas millage: 20 km / litter
* expressway tall fees are the discounted fare by using ETC (late evening/early morning discount)
* ferry fare is based on the single-size bed fare (not individual/single room but normally shared with 2 or 3 passengers per room)

After comparing my time and budget, Niigata-Otaru is, again, my first choice.  Other two routes, by looking at their arrival time, may seem to allow me to start my trip in Hokkaido from August 17, however, I will be arriving there late afternoon or night time to Tomakomai;  I will need to go to the place I stay for that night shortly after my landing.  So even you are getting there, your trip for that day is very much over and you will be paying for the accommodation in addition to the ferry fare.  Also, from my experience, you do not want to ride during the night time (so many bugs...).

Another reason I like the Niigata-Otaru ferry, although I will be arriving on August 18, I get there by 4:30 a.m. and will be on my motorcycle by 5:30 or so.  I can use a full day-time for riding.   


I have a plenty of time to rest on the ferry so I will be physically and, of course, mentally (with a great excitement!) ready for a long journey.  You will be spending night in the ferry so basically the ferry fare is including your first night accommodation too.  Good deal!


Compare to Tomakomai which is the southern part of Hokkaido, if your first destination is in norther area, such as Wakkanai, the northern tip of Japan, you will save a lot of time by starting from the port of Otaru.

If you are planning to ride southern and/or central Hokkaido during the first part of your trip, Tomakomai will definitely a good starting point.

Well, you know some options to get to Hokkaido now. In the next several episodes, I would like to talk about good places to visit (ride) from my last year's experience and also places I would like to go this year.  Also, I will be introducing what you need and prepare.

Hope you will enjoy riding Hokkaido this year too!


If you enjoy this blog, please click the below icons for blog popularity ranking.

Thanks!

にほんブログ村 英語ブログへ にほんブログ村 バイクブログ キャンプツーリングへ

Please also visit my other blogs:


2013年5月10日金曜日

Camp Touring to Doshi in Yamanashi: Nature Land Om Camp Site

During the GW holiday week, I visited many places and I would like to talk about a camp site I visited.

Nature Land Om 
5964 Doshi-mura, Minami Tsuru-gun, Yamanashi 402-0208
〒402-0208 山梨県南都留郡道志村5964
Phone: 0554-52-2275

Nature Land Om is located near the boarder of Yamanashi and Kanagawa.  It is about 80 km from Shinjuku in Tokyo.


From Tokyo, you can take Chuo Express Way to Sagamiko IC.

From Sagamiko IC, go on Route 20 toward to Otsuki for about 2 km.

Turn LEFT on Route 76.  You will cross a bridge over the Lake Sagamiko.  Soon after you cross the bridge, there is a super market on you left if you want to buy food and drinks (they also have  some camping/BBQ items too).

Keep going on Route 76 for 12 km.  Turn LEFT on Route 413 (a.k.a. Doshi Michi).  

Ride for 13 km Nature Land Om's entrance is on your left.  There is Doshi Elementary School right before you see the entrance of camp site.


There is a reception/office of the camp site.  It looks like a Ryokan (I guess it is a Ryokan).  You pay the fee (I think it is about 1,500 yen for 1 person, 1 motorcycle, 1 tent,,, really good deal!) and they will give you a camp site's map and a tag (hang it on your tent so that they know you have paid the fee).

When I got there, there were only a few families since it was on a weekday.  I could keep the entire section by myself.


There is also a pond. They release trouts in this pond and you can fish.


There are couple of creeks run through the site and this place is covered by trees; very quite and relaxing.


It was a bit cold at night (it was about 6℃) but a portable grill kept me warm.  It is very relaxing having drinks and watching fire from the grill.


All facilities are well-maintained and clean.  This site's fee is reasonable and very accessible from Tokyo area.  I will definitely come back soon. 


If you enjoy this blog, please click the below icons for blog popularity ranking.

Thanks!

にほんブログ村 英語ブログへ にほんブログ村 バイクブログ キャンプツーリングへ

Please also visit my other blogs:


2013年4月25日木曜日

Tire Cleaning

In today's episode, I would like to introduce how I wash and clean the aluminum die-cast wheels.
うwっtっっdせzsrcvrっv

My Sportster (XL883 2006 model) has a pair of aluminum die-cast wheels.  The rim/edge of the whlees are polished, like other aluminum parts used on the bike, but the spokes are pearskin-finish (rough-matte finish).


I haven't washed my wheels for a long time. They get dirty quickly and usually take a lot of time if I wanted to clean them up fully.  This past weekend, I found sometime to spare so I have decided to shine them up before I go to motorcycle trip end of this month.

You can see how I was lazy for the last 3-4 months from this photo...


The bottom of the front rim, where rain drops and dirt stay, especially gets dirty.


Axle/Hub is where tough to reach by hands and clean.  There are some black spots and stain which don't come off easily.


I always wonder those black stains and spots are rust or break-dust.  Either way, probably takes a lot of work to clean them.

As well as rim of the back wheel, there are some water-spots and stains (most likely aluminum rust).  As this bad, most of shampoos or cleaners won't work.


Even the brake disk was rusted...


Well, let me show how I clean them up!  

(This is my own way to clean.  It works for me but if you want to try, please do it at your own risk!)

Here are the tools I use.  The blue brash is for washing shoes and can be found at any 100-yen store.  This helps me to clean the hub and axle where is very difficult to reach with hands. A brass wired brash is for the stain and rust, but it takes forever to clean entire wheel with this so I only use partially.  What I like the most and my secret weapon is a steel wool (in Japanese, Bon-star).  This particular one has cleanser instilled.


The first step is to wash off dirt with lots of water.


Next, I use the steel wool (with cleanser) and also use a brush.  I also use the steel wool to clean brake discs too.


Usually, this is all I do and clean enough to me, but this time I will shine them up more.


I often use a wheel cleaner as well.  This helps to wash the section my hands nor brash cannot reach.


The steel wool works on the rust on brake discs very well.


It looks OK but still dull if you see closely.


You can shine them up with the steel wool only but takes lots of effort and time.

What I do is to use the steel wool AND an abrasive compound.  I use a "Pikaru".  This Japanese compound for metal/aluminum is inexpensive and can get it from any supermarket.


Use your fingers push against the rim and polish.  Constantly wipe it up and check how it is.  Keep polishing up until it shines up.


And this is the result!


Not bad.  You can have shiny wheels without buying an expensive cleaner!  


Have a nice G.W. holidays!


If you enjoy this blog, please click the below icons for blog popularity ranking.

Thanks!

にほんブログ村 英語ブログへ にほんブログ村 バイクブログ キャンプツーリングへ

Please also visit my other blogs:


2013年4月9日火曜日

How to Start a Motorcycle Camping Trip ("Camp-touring") #2

In this episode, I would like to talk about camping gears and tools I have in addition to the "5 must-have-items" I introduced last time.

There are so many tools/gears available to make your camping trip more comfortable and enjoyable.


Since "camp-touring" on motorcycle limits the amount of luggage you can take, you will need to carefully select what you want to bring with you.  Also, 
enjoy "riding" to the camping site is another goal for us, we want to pack small and minimize the effect to drivability/maneuverability.

Selecting the tools/gears for the camping trip is actually my favorite part of the camp-touring.  Thinking about trying out a new tool (toy!?) I got online before the trip, what to cook, what kind of   local drinks available in the region I am going to...etc; I really enjoy the preparation process. 


The 5 must have items are the following:

1. Tent
2. Sleeping bag
3. Sleeping pad
4. Lantern/flashlight
5. Bug repellent


(The top black bag is my main tent, Coleman Phad X3.  2nd one is Coleman Avior X2 tent.  Green bag is my Coleman Compact Inflator Mat II L sleeping pad.  Orange bag is a NANGA down sleeping bag)


To set up a tent, you will need a hammer and pegs.


My lantern (Micro-quad lantern by Coleman) and headlight.  Don't forget bringing extra batteries.


Here are the rest of tools and gears I have (for one-night camping trip).

- Tarp or ground-sheet for tent (blue tarp)

I lay this under the tent to prevent damage of my tent's bottom and moisture from the ground.  My tent (and most of tents) has waterproof bottom but it still gets wet sometime.  Using a tarp makes much easier to dry and clean-up the tent next day before you put it away.  The one I have is know as "blue-sheet" in Japan.  It is about 200-500 yen and you can find in many stores.

- Portable table (Red bag)

This is  by a Japanese camping/outdoor manufacture, Snowpeak.  This low-table is perfect for small chair and sitting on ground.   Its photo is at the top of this episode.  

- Portable chair (camouflage-printed bag)

I prefer to have a larger chair (with armrest) but it is too large to load it on my motorcycle (some people still bring though).  This folding chair, as you can see in the photo, can be packed so small.  At the camp site, I often sit on the picnic sheet and use this chair as a small table.

- Portable windshield (silver rectangular metal above the sandals)

*This windshield is for a camp stove.  It make a big difference in windy condition.  I always bring this just in case.

- Picnic sheet (roll-up checkered one)

This is by Coleman.  The size is just right for one or two person (140 x 90 cm).  The backside of the sheet is waterproof.  Eat, drink, read, lay dawn and take a nap... how nice!

- Sandals

It is more comfortable wearing those at the camp site and also makes easier to go in and out of tent.

- Hanger

I use this to dry towels and gloves or other riding gears if they get wet.  And of course it can be used to hang your jacket.


- Camp stove
Two major types used for camp-touring: cartridge gas and fuel (white gasoline or regular gasoline).  I recommend the gas type.  It is easy to use and very small when it is packed.

- Pots, pans
You can find variety of pot/pan cook-sets in diffident shapes and sizes. Most of them are stackable.  I use them as dishes too.

-Cup or mug
I bring a mug-cup and use this for my coffee, sake, wine, soup... everything.


- Pot / Mess Aluminum Tin (aka mess-tin) by Trangia
This simple aluminum rectangular-shape cooking pot is very nice.  I use this to cook rice.  Because of its shape, you can store small cooking items inside very well.

- Dish soap
I bring it in a small container (I am using a small plastic bottle with a top and I think this is for cosmetic use, originally) and also use a eco-friendly one.


-Water jug
I use a foldable water bottle/jug by Platypus (2 litter).  You can also use a pet-bottle
-Wine container
This is also by Platypus.  You can save some room and also do not worry about trashing empty bottle (many camping sites ask you to take your trash home with you). 

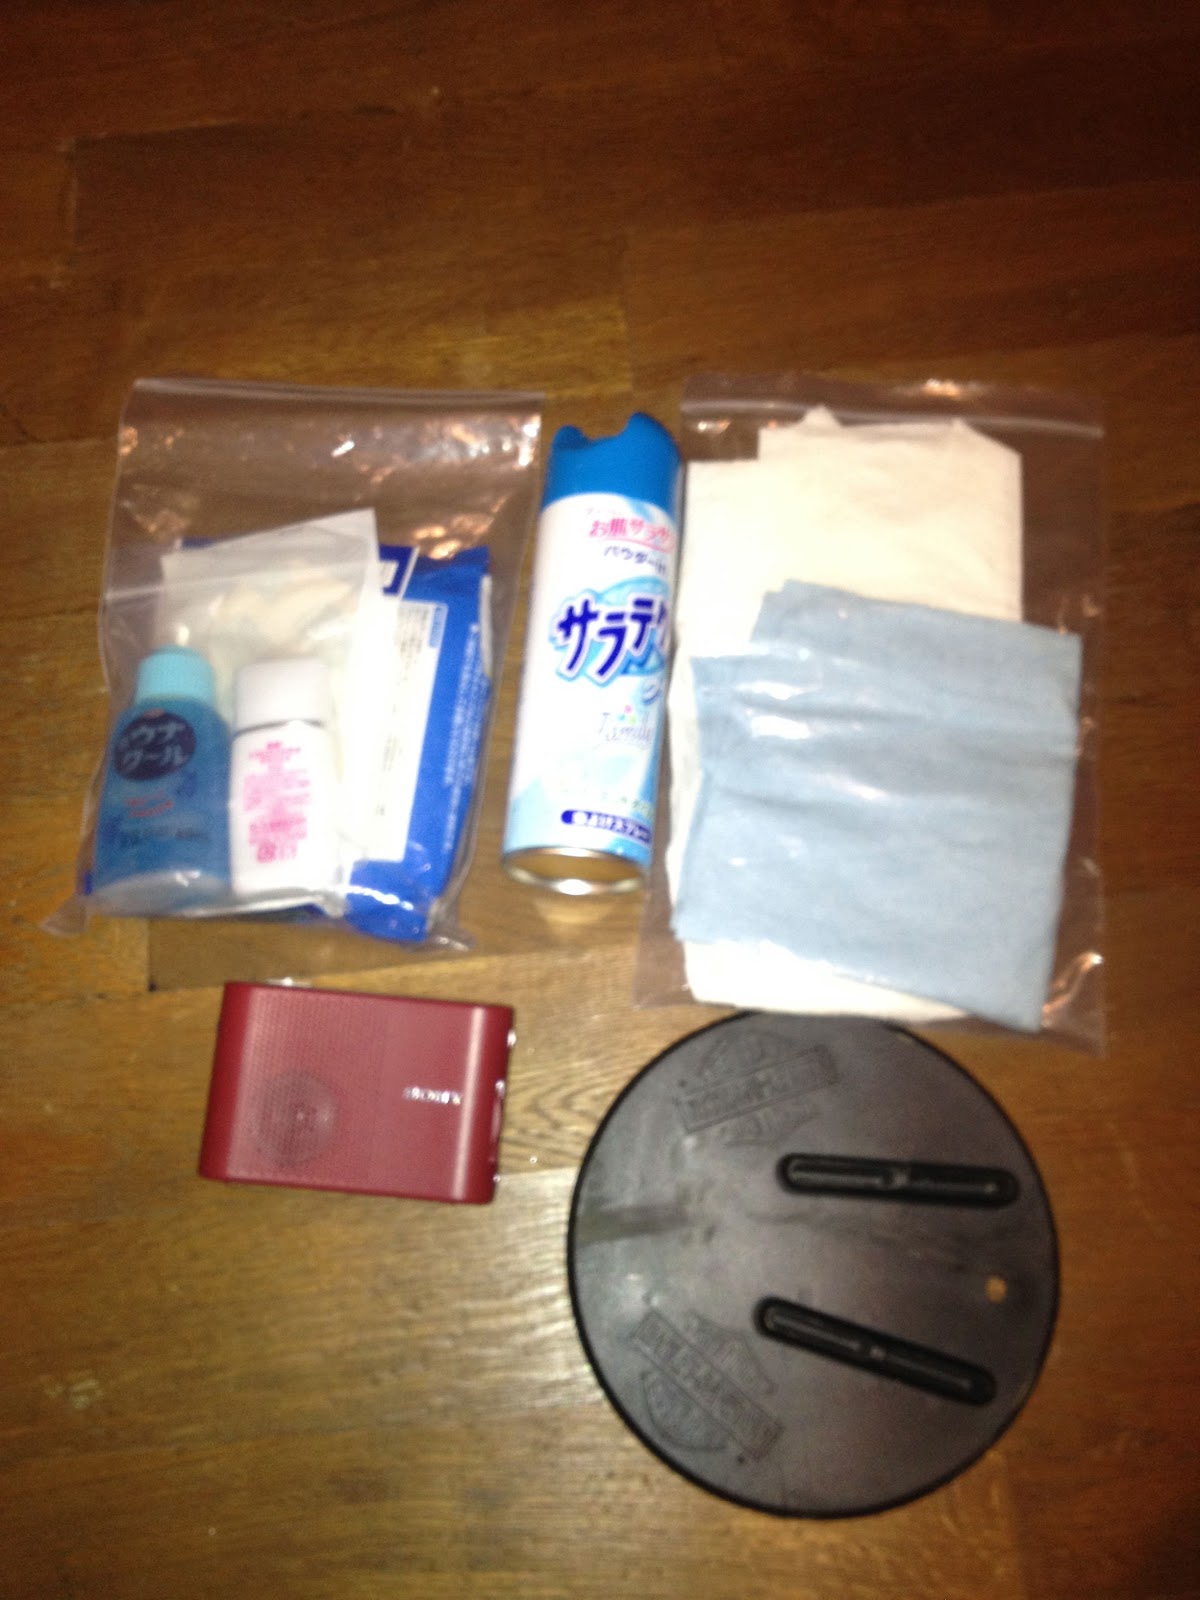
- Bug repentant, insect bite reliever, alcohol wipe, band-aide...etc

- Radio
I love listening baseball game on radio.  Also, you can catch a weather news where there is no mobile phone signal.

- Motorcycle Kick Stand Coaster (bottom right on the photo)
I recommend taking this to a camp-touring.  Motorcycles are heavy pieces of machinery and unless you're on concrete, the kick stand might slowly dig into the ground overnight because of the weight and your motorcycle may go down by the time you wake up in the morning. This prevents your motorcycle from tumbling over.  You can also use a piece of wood or rock (make sure it is stable enough).


In addition, I like to bring a portable BBQ grill.  Some Japanese local manufactures make many great products.  Here is one of them and my favorite.  This is made by a small factory, Sho's (笑's).  They make amazingly compact yet tough BBQ grills.  


This grill is [B-6 kun (B-6君)] and can be folded to B-6 size.


The bottom of the grill has some openings with good airflow for a high combustion efficiency.  You can burn some logs or charcoal and enjoy BBQ.  I love buying some meet, fish, and veggies, put them on grill, and enjoy a cigar and good drinks!  Don't forget bringing soy source and crazy salt; they make everything taste good ;-) 


Those items listed above are just examples.  You can bring anything you want as long as the luggage space of your motorcycle permits.  As you go on the camping, you will find out what you need and what you don't use.  More importantly, you will find out what you want NEXT! 


Welcome to the crazy world of outdoor-item shopping!
Soon, AMAZON will be your best buddy.  Enjoy!


If you enjoy this blog, please click the below icons for blog popularity ranking.

Thanks!


にほんブログ村 英語ブログへ にほんブログ村 バイクブログ キャンプツーリングへ


Please also visit my other blogs: